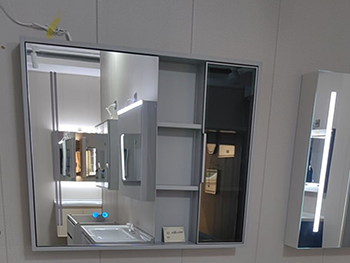
Top Tips for Installing Dimmable Smart Bathroom Mirrors
Introduction
Dimmable smart bathroom mirrors combine functionality with modern technology, offering features like adjustable lighting, anti-fog capabilities, and even Bluetooth connectivity. Installing one requires careful planning to ensure safety, aesthetics, and optimal performance. Whether you're a DIY enthusiast or hiring a professional, these tips will help you achieve a seamless installation.
1. Choose the Right Mirror for Your Space
Before installation, select a mirror that fits your bathroom’s dimensions and style. Consider:
- Size and Shape: Measure the wall space where the mirror will be mounted. Ensure it doesn’t obstruct other fixtures like sinks or cabinets.
- Lighting Features: Look for dimmable LED lights with adjustable color temperatures (warm to cool white) for versatile lighting options.
- Additional Features: Some mirrors include built-in demisters, touch controls, or Bluetooth speakers—choose based on your needs.
2. Check Electrical Requirements
Smart mirrors require a power source, so ensure your bathroom has the necessary wiring:
- Hardwired vs. Plug-In: Hardwired mirrors connect directly to your home’s electrical system, while plug-in models use an outlet. Hardwired installations are cleaner but may require an electrician.
- GFCI Protection: Bathrooms need Ground Fault Circuit Interrupter (GFCI) outlets or circuits to prevent electrical shocks.
- Voltage Compatibility: Verify that the mirror’s voltage matches your home’s electrical system (typically 110-120V or 220-240V).
3. Plan the Installation Location
Proper placement ensures functionality and safety:
- Height: Install the mirror at eye level (around 60-65 inches from the floor) for optimal use.
- Distance from Water Sources: Keep the mirror at least 60cm (24 inches) away from showers or bathtubs to prevent water damage.
- Wall Type: Confirm whether your wall is drywall, tile, or concrete, as this affects mounting methods.
4. Prepare the Wall and Wiring
Before mounting:
- Turn Off Power: Always shut off electricity at the circuit breaker before working on wiring.
- Mark Drill Points: Use a level and pencil to mark where screws or brackets will go.
- Cut Openings for Wiring: If hardwiring, create a small opening in the wall to route cables neatly.
5. Mount the Mirror Securely
Follow these steps for a stable installation:
- Use Appropriate Anchors: For heavy mirrors, use wall anchors or toggle bolts, especially on drywall or tile.
- Align Carefully: Double-check levelness before securing screws to avoid crooked placement.
- Hide Wires: Conceal cables behind the mirror or within the wall for a clean look.
6. Connect Electrical Components
For hardwired mirrors:
- Match Wires Correctly: Connect live (black/brown), neutral (blue/white), and ground (green/yellow) wires as per instructions.
- Secure Connections: Use wire nuts or terminal blocks to prevent loose connections.
- Test Before Finalizing: Turn power back on briefly to check if the mirror lights up before sealing everything.
7. Configure Smart Features
After installation, set up smart functionalities:
- Pair with Apps: If the mirror has Bluetooth or Wi-Fi, follow the manufacturer’s guide to connect it to your smartphone.
- Adjust Settings: Customize dimming levels, color temperatures, and timer functions.
- Update Firmware: Ensure the mirror’s software is up to date for optimal performance.
8. Ensure Proper Sealing and Waterproofing
Bathrooms are humid, so protect your mirror:
- Apply Silicone Sealant: Seal edges where the mirror meets the wall to prevent moisture ingress.
- Check Anti-Fog Functionality: If your mirror has a demister, test it to ensure it works effectively.
9. Maintenance Tips
Keep your mirror in top condition:
- Clean Regularly: Use a microfiber cloth and mild cleaner (avoid ammonia-based products).
- Inspect Wiring: Periodically check for loose connections or corrosion.
- Replace Bulbs as Needed: LED lights last long but may eventually need replacement.
10. Troubleshooting Common Issues
If problems arise:
- Lights Not Working: Check circuit breakers, wiring, or Bluetooth connectivity.
- Fogging Issues: Ensure the demister is properly connected and the bathroom is well-ventilated.
- Unresponsive Touch Controls: Reset the mirror or check for firmware updates.
Conclusion
Installing a dimmable smart bathroom mirror enhances both functionality and style. By following these tips—selecting the right mirror, ensuring proper electrical setup, and securing a waterproof installation—you can enjoy a high-tech, spa-like experience in your daily routine. Always prioritize safety and consult a professional if unsure about electrical work.
Would you like additional details on any specific step?
يستخدم هذا الموقع ملفات تعريف الارتباط لضمان حصولك على أفضل تجربة على موقعنا.
تعليق
(0)